Tuesday, November 19, 2013

Tutorial Tuesday - Soft Soldering Links and a Review


I'm linking to another tutorial this week, but should have a Native Bloom tutorial up next week.  Since I have taken a brave step forward and invested in my craft, I decided to give soldering a serious go.  As I researched soldered pendants, I found a lovely image that linked me into the blog for Rings & Things.


This picture leads to an original post that teaches you how to solder with the Simply Swank set, which I think they no longer carry in their store.   They have an updated post with tutorial HERE.  I followed the link to a very easy to follow tutorial and found that they offer an exclusive Rings & Things Glass Soldering Kit, complete with iron, iron stand, copper foil, lead-free solder, flux, brush for flux, 24 pieces of 1 inch glass squares, and a sheet of high quality images.  


I could not resist and found the price quite reasonable at $59.50 (+ $7.95 shipping), so I purchased the item.  It arrived at my door within 4 business days, well packaged, and I dove right in and made this piece.  The "S" is from a Dover collection called Ornate Letters and Initials.


Here's the back.  I used an image included in the kit for this side.  


I had a bit of difficulty getting my solder to flow properly after a few minutes use, so I did some research and found a couple of videos that are quite useful.  They are from Simply Swank and show you how to properly tin and clean a solder tip, and how to fix one that has stopped working due to oxidization.  

Simply Swank - Trouble with Tips Part 1 Tinning and Cleaning a Tip
Simply Swank Trouble with Tips Part 2  Cleaning an Oxidized Tip

Mine was still working, but it was oxidized a good bit and made my solder dirty the last couple of passes.  I also found it difficult to get my solder smooth, so I ended up with a couple of lumpy places.  I think now that I have seen these videos I will have no problem with the soldering kit.  It is perfect, and I love that I was able to create a necklace just a few minutes after opening the box.  The solder is good quality, and the flux is non-toxic.  They even included a color print-out of  the blog post.  When I make my next necklace, I will spend a bit more time tinning my tip, make sure to keep it very clean, and probably trim my copper foil a bit with an X acto blade (see how to trim in Simple Soldered Pendants video by Stampington & Co).  

I am very pleased with this kit, and I can't wait to make more soldered pendants!


Monday, November 18, 2013

Metal Clay Monday - Polymer and Metal Clay Mix

I love my polymer clay, especially Sculpey, so I don't plan to abandon my ventures with this versatile medium when my metal clay gets here.  I really want to incorporate Sculpey into my metal clay pieces, so I thought I would show you guys some of the lovely pieces I found on Pinterest that combine metal clay with polymer clay.

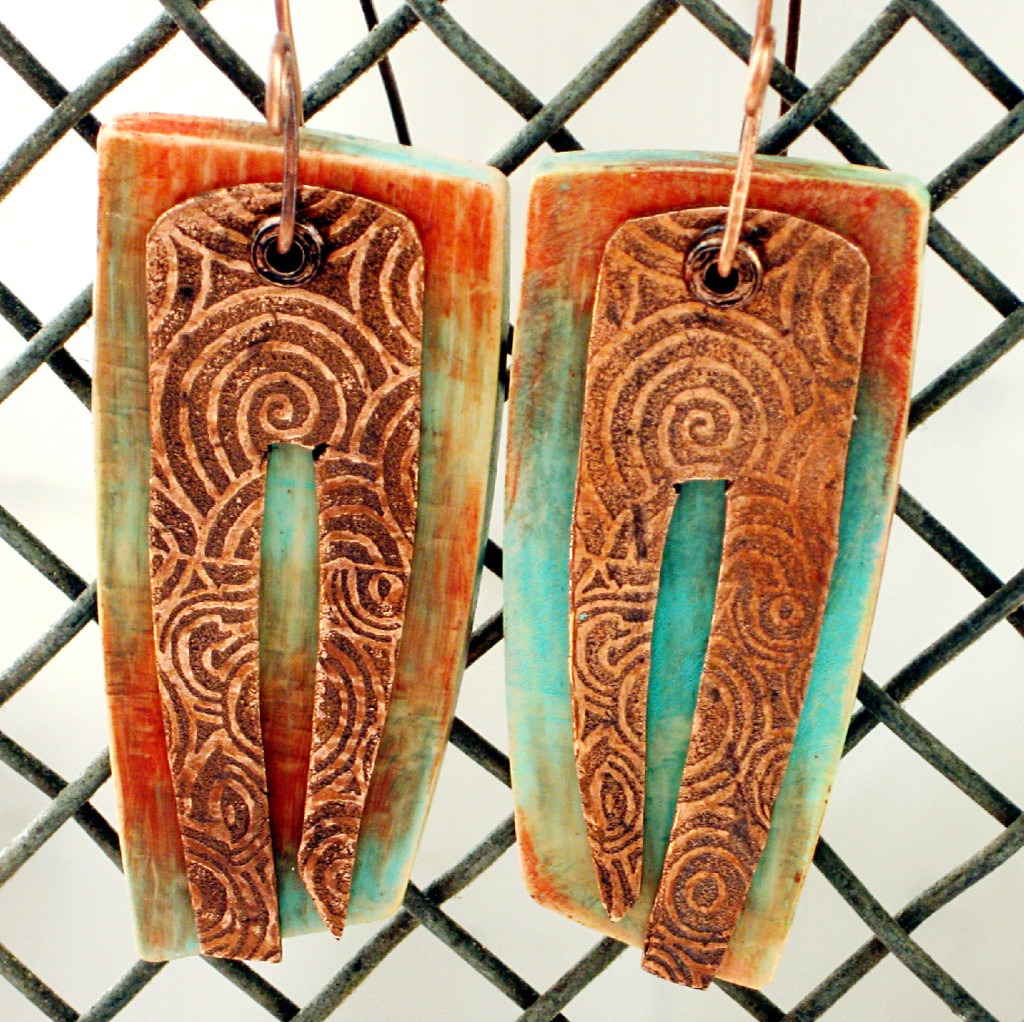
These Machu Picchu earrings by Christine Damm are lovely and tribal looking.  I love how the polymer clay adds color to these earrings!   See more of Christine's work on her blog Stories They Tell.  She makes the most lovely textured and colored polymer clay pieces.


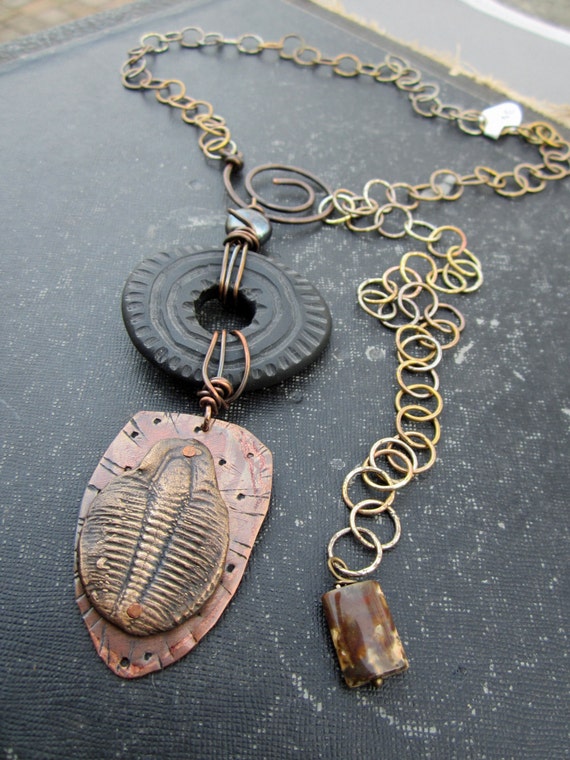
How about this wonderful piece by Staci Louise of Staci Louise Originals?  It is wonderful, like all of her other pieces.  The bronze centerpiece is cast from a mold of a real fossil, and the black piece is polymer clay.  She also incorporates drawing as texture with her metal clay work, and I love the handmade and artistic look of them.  I did not realize how much of the pieces I like and have pinned are her pieces until I looked around her shop and blog.  


I also love this ring by Celie Fago.  It is a ring made of PMC and polymer clay.  See the back of the ring HERE.  See more of her work on her website.  Lovely and inspiring!


My loan went through and I got my debit card last week.  I ordered everything I could off my list (and made a list for another day).  I received some of my packages Saturday, and the remainder will be here Wednesday.  I can't wait to get my kiln and get started!  


Friday, November 8, 2013

Investing in My Business

We were scheduled, hubby and I, to go to the bank yesterday.  But Brandon went ahead on Wednesday to Regions bank and started the application for my loan.  It's Friday and I now have a checking account set up with $3,500 in it to invest in tools, equipment, materials, and supplies.  Now to make some important lists, narrow down some possibilities, and look around for the best possible prices.  I cannot tell you how nervous, scared, and excited I am to get started.

Okay, fast forward a few hours and I have made my list and am now checking it twice.  It is so hard to work within budget and do everything that needs to be done.  We could have taken more out, but really did not need to.  I have to make it work somehow.

I'll be purchasing a good bit of items, but when I look at everything on a sheet of paper, I cannot believe it is $3000 worth (I will be leaving a $500 cushion just in case).  It seems so crazy, and I will probably spend all of that within a day (or even just a few hours) once I have everything planned out.  I keep going over my list and adjusting, marking an item off or moving it to a "purchase later" list.  So wild!

I will keep a schedule of when I placed my orders and how long it takes them to get here.  It is very likely that I will only have enough clay to make my catalog/display pieces, then have to reorder once I have actual orders placed.  Until I build up a little capital my turn around time will be high.  Maybe my cushion will be used for this and then replaced, but I need the cushion to make my first three months loan payments.  I am just not sure how I will make this work yet, but I am ready to jump in.

As my equipment and supplies come in I will be doing some unboxing on video so you guys can see what I am buying.  I'll share with you a bit about how I set my booklets up too, the lighting I plan to purchase, and some photography tips.  I don't know a lot, but what I do know I will share with you.  :)

Well, wish me luck!  I am off to shop and dream.

Monday, November 4, 2013

Tutorial Tuesday - Eco Etching by My Brown Wren


Last week as I ventured around Etsy looking for amazing patinated metal clay pieces I stumbled across the work of Tammi Sloan from the shop My Brown Wren.  I first fell in love with some lovely textured pieces she made with metal clay, then discovered her etched pieces.  To my surprise, these pieces were etched not with harsh chemicals, but salt water using a very unusual and green technique.  This chemical free tutorial teaches you how to use a cellphone charger, salt water, rubber stamps, and solvent-based ink pads to create lovely etches without the chemicals.  The tutorial is $9.99 and can be purchased HERE.  You can also find her Press 'n Peel transfer tutorial HERE.


Here's Tammi's bio.

Creating art is a part of my genetic makeup, having grown up in a family of artsy people. After dabbling in many creative endeavors over the course of my lifetime, I find myself totally immersed in jewelry design. I’ve honed my skills taking classes and workshops from several respected artists in the field, such as Nancy Megan Corwin, Carol Babineau, Mary Chuduk, Gail Nelson and Patrik Kusek. In 2010, I became a certified PMC artist/instructor. Today, I am exploring metalsmithing, etching and enamels, and combined with my work in PMC. In addition to creating art I also offer classes in jewelry making. For more info, please visit my website: My Brown Wren.


I have two little ones running around here, so having this process available to me without the need for dangerous will be worth the investment.  Check out Tammi's website and shop for more information and inspiration.

*Update:  I purchased this item and reviewed the PDF.  I have not tried to set everything up yet (I will let you know when I do), but the tutorial is very informative and easy to understand.  I look forward to getting all the items and working on my own etched jewelry.

Metal Clay Monday - Dreaming

Not much time for inspiration right now, so I thought I would just share a picture of my dream kiln.

Brandon (hubs) and I will be going this week to apply for a loan, so wish us luck!  Since the Kiva Zip loan process did not go well, I will have to rely on a personal loan to purchase the equipment and materials I need.  

Sunday, November 3, 2013

Painted Rosette Necklaces Giveaway Winners


Well, we didn't hit the 100 comments mark, but I decided to go ahead draw two numbers and give both of these necklaces away.  Here are the numbers from Random.org


Comments number 28 by Diana is my first winner.  


And comment number 18 by chendric is my second winner.


If you guys will email me your mailing addresses, I will get these out to you within a couple of days.  

nativebloom@outlook.com

Thanks everyone for playing, and for all the valuable information you have given me.  You are helping me create a learning environment for yourselves and others, and the input you give me will make it even more inspiring and welcoming.  Keep an eye out for another giveaway, I think I will have one up by Friday!