Tuesday, October 29, 2013

Tutorial Tuesday - Beginners Bead Stringing Tutorial


Photos and instructions by Shayna Butler
nativebloomstudios.blogspot.com
nativebloom@outlook.com


Tools:
Two pairs of pliers, any kind
A pair of wire cutters, flush cutters, or old scissors
Tape measure or ruler
Plastic or wooden bowl
Crimp tool
Optional – bead tray


Materials:
20 grams E beads
20 grams seed beads
Natural stone chip beads
Glass focal beads
Wire (I use Beadalon .018 inches)
Bead or tube crimps
Crimp covers
Small jump rings
Medium rings
Large chain
One lobster clasp
One toggle clasp


Wrap Bracelet Instructions

Step One: Cut two lengths of wire, each about 4 to 6 inches longer than you want your finished product to be.  You might want to give yourself 6 inches if you are a beginner. 
I wanted my finished necklace to be about 20” and my wrap bracelet to be about 36” so my pieces were cut to 24” and 40”. 

Step Two: Use a crimp to add a medium jump ring to one end of the 40” wire.  First slide the crimp bead onto the wire, then the jump ring, the thread the wire around and back into the crimp bead. 


Slide the crimp down close to the end of the wire and position both parts of the wire side by side.  Make sure one does not overlap the other inside the crimp.


The crimp tool has two slots; the one on the outside looks like two half circles, and the one on the inside has a notch on one side.  First you will need to close the crimp using the inside notch.  This will separate the wires.


Then you will need to finish closing the crimp with the outside slot. 


I like to cover my crimps with a crimp cover.  It protects the crimp and gives your piece a finished look.  Place the crimp cover over the crimp.  Make sure the wire lines up in the groves of the crimp cover and close it gently with your pliers.  If you have nylon covered pliers use them to keep from scratching this crimp cover.  If not, be gentle and use smooth pliers instead of pliers with teeth.


Use the wire cutters (or scissors) to trim the tail of the wire.  Leave enough tail to string about two or three E beads over.  If you cover the wire you will not have to worry about it slipping or sticking out and poking you. 


Step Four:  String the beads on the wire.  I strung about two and a half inches of E beads, then one glass focal bead, 2 ½” E beads, 1 focal bead, and so on until I reached the desired length.  The last group of E beads I had to make about three and a half inches to make it the right length.  I held the end of my wire to keep the beads on and wrapped the bracelet around my wrist to make sure it wrapped around enough times, and that it did not have a gap too big for it to fit like I wanted it.  I left about one and a half inches for the clasp and jump ring.  I knew if I did not the necklace might be too loose. 


Step Five:  Once you have measured your bracelet out and double checked it on your wrist, it is time to close it off.  First you will need to add a small jump ring to your lobster clasp.  Then slide on a crimp bead, the jump ring/clasp combo, and slide it back through the crimp bead and into two E beads.  Pull the wire close to the jump ring but not too tight.  Line the wires up side by side and close the crimp bead with the crimp tool.  Cover with a crimp cover.


Step Six:  Attach an extender chain to the medium jump ring on the other end of the wrap bracelet.  This will give you a bit of room to make your bracelet looser.  You will also be able to wear this as a necklace, so you can use this to adjust the length.  Five to six links should do, but I ended up adding about ten to mine so I can wear it around my ankle too.  Add a charm or beaded headpin to the last link for a decorative touch.


Toggle Clasp Necklace Tips

You will use the instructions above to create your toggle clasp necklace, but a few things will be different.  Make sure to cut the wire shorter.  I cut my wire to 24” because I wanted my finished necklace to be 20 inched long.  Second, make sure not to secure the wire too close to the toggle.  It will need to rotate to fit through the other end of the clasp, and if the wire it too tight it will not be able to move freely. 


You will also need to make sure the wire will double through the seed beads.  If it does not, add two or three matching E beads to the start and finish of the necklace rather than cut the tail off.  My wire went through my seed beads without a problem.   Also, make sure not to put any large beads close to the toggle or the opening will not slide down the necklace far enough to let you close the clasp.

For my necklace I did about two and a half inches of seed beads, then a pattern of chip bead, seed bead, chip bead, seed bead until I achieved the desired result.  I alternated lengths of 1 ½”, 2”, and 2 ½” seed beads in between each group of chip beads.  I wanted the necklace to be a bit asymmetrical, so I did not space the pattern precisely.

Since you will not be able to add an extender, it is important that you carefully measure the length of this necklace and check it on your neck before you close it off.  


My necklace ended up being the perfect length to wrap around my wrist three times (and around my ankle twice). 


I hope you enjoyed this tutorial.  If you have any questions, feel free to send me an email at nativebloom@outlook.com.  For a PDF version, click HERE, and if you want to check out the video follow THIS LINK.    


Monday, October 28, 2013

Metal Clay Monday - Patina Queens


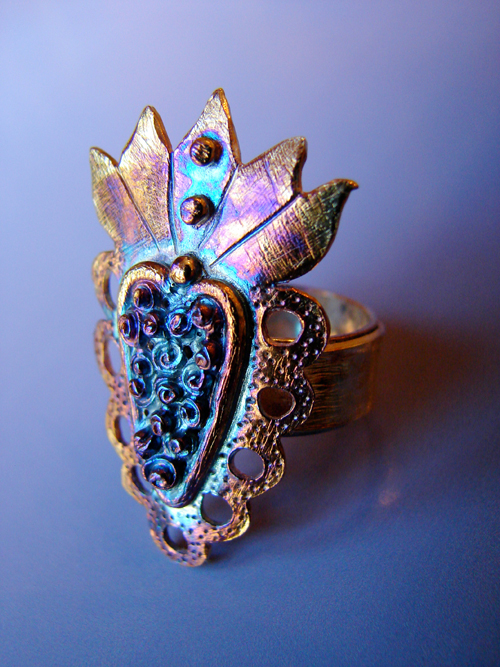
Patina - it can transform a piece, change a mood, take you back in time.  I first saw metal clay on Flickr, and Lorena Angulo was an instant favorite artist.  I followed her right away, and I check her blog and photostream frequently for inspiration and to admire the beauty of her creations.  Yeah, I kinda have an artist crush on her.  It's okay, she knows it.  She works wonders with her folk art pieces, most inspired by her Mexican heritage and rich with culture and beauty.  I love her PMC clay pieces best, she makes amazing use of liver of sulphur.  Here is a picture of her piece "Crown Heart" with a lovely rainbow patina from liver of sulphur.  Find more of her work on her blog.


I also love Kristi Bowman's work.  She uses a lot of copper clay, and torch fires her pieces to achieve a heavenly rainbow patina on them.  I am in love with her pieces, and with the beads and other components she uses with them.  She has an excellent eye for color and texture, and makes pieces that take my breath away.  If you are drooling over these components and don't have the set up to create them, check out her Etsy shop; she sells them at very reasonable prices.  You can also purchase her finished jewelry pieces there, and find her designs frequently on the Earrings Every Day blog.


Not enough beautiful for you?  Need more?  Then check out my Pretty Patina Treasury List on Etsy for more gorgeous pieces.  Here's a peek.


Check back with my tomorrow, I will have my first tutorial available for you in blog, video, and PDF form.  


Thursday, October 24, 2013

Studio Updates

First of all, I would like to thank everyone who has participated in my giveaways.  You guys are sweet, wonderful, supportive, and informative.  I am happy to know my creations are going to such lovely people, and I wish I could give something away to each one of you.  Thanks to you all!

Second, for reasons I don't want to get into I will not be able to complete my loan process with Kiva Zip.  I was not turned down or anything, rather decided to step back and attempt to obtain a loan with a local bank.  It should not be a hard process (hubs and I both have good credit), and I will probably be able to get started even faster with a local loan.  I would still recommend Kiva Zip to anyone not able to obtain a loan through the usual channels.  I hope to go with my husband next week and get signed up as a member of our credit union, open up a business checking account, and apply for a personal loan for $3000.  If all goes well I should be able to go shopping for tools and materials by the beginning of November.  Let us hope.  :)

My third update to share with you is that I am in the process of making my first Native Bloom tutorial.  I am teaching a workshop at my local Hobby Lobby on November 2nd, so I thought I would share with you guys the information I will be teaching in my class.  I will have a blog post for you with links to a PDF and a YouTube video.  I decided to present  my tutorials using all three methods since my readers like a variety of teaching methods.  So whether you like a good ol' blog post, prefer a PDF to print out and take with you, or need to be taught visually, your method will be covered.

Here's where the magic is happening.


It's my dining room, and it is a hot mess.  Just keep in mind that I have a four-year-old and a one-year-old running around me the whole time I am doing this, and they constantly vie for my attention.  They scatter toys and confetti the room with small round cereals that crunch under my feet, draw all over my furniture, and scream for "pink chocolate" (strawberry milk) and snacks the entire time I create.  That's not much of an excuse though, and the truth is that if they were not here I would still be surrounded by a mess.  It's how I roll.  

I should have all of this ready by Monday, so keep an eye out.  It is going to be a beginner tutorial, just stringing and learning to use crimps and such.  Don't worry, I will also have a variety of intermediate tutorials up soon.  I plan on working on tutorials for the Painted Rosette necklace next, followed by a multi-strand bracelet, and then my Charmed Brass Book necklace.  

Thanks again to you all, hope you enjoy the rest of your week and have a wonderful weekend!!!!!

Saturday, October 19, 2013

Blog Giveaway - Painted Rosette Necklaces - Comments Closed


This giveaway is over, please see THIS POST to find out who won.  :)

Another giveaway, same rules.  But this time I'm going to add something.  If you are a minor, make sure you get permissions from your parents or guardians before entering.  

This necklace was featured in the Autumn 2013 issue of Jewelry Affaire magazine.  If I get 100+ comments on this, I will draw for a second winner and give away the other rosette necklace featured in the article.  

To enter the contest you must comment below.  Each one of the following types of comments counts for a vote.  I will use Random.org to determine the winner, so make sure to make each entry count by listing them INDIVIDUALLY.  International players are more than welcome, this prize is very light weight.  ;)

1.  Comment with an answer to this question - What types of jewelry tutorials would you like to see on this blog?  (Examples: beginner beading, resin and bezels, polymer clay, metal clay, stringing, mixed media jewelry, etc.)

2.  Follow my blog!  I'd love for you to follow me, and I will be offering tutorials and giveaways so it will be beneficial to you too.  Try me out and if you are not happy with my content after a few weeks, just unfollow. Just leave me a comment that says something like "Hey crazy jewelry lady, I am now a Native Bloom follower."  If you have a blog, feel free to include a hyperlink to yours, I will return the favor (and other readers may too).

3.  Tell me, are you interested in blog posts about the process of getting published in magazines?  What do you wish to learn the most about being published? 

4.  Like my Native Bloom page on Facebook.  When I start my jewelry sales the beginning of next year I will use this page to offer deals and discounts.  Leave a comment letting me know you liked my page (along with your FB name).  

5.  Share this post on your Facebook page (include a link to your post in the comment).

6.  Repost this on your blog (make sure to include the link in the comment).

7.  Pin this picture with the headline "Painted Rosettes Giveaway by Native Bloom - ends 11/01/13." Once again, include the link please.


That's seven ways to win!!!!!  Once again, make sure to post each entry individually to give yourself extra chances to win.  I'm going to let the giveaway run until Saturday, November 1st, 2013 at 11:59 PM Central.  A winner will be announced in a separate post on November 2nd, so follow my blog or make sure to check back on that day.  I will give the winner(s) a week to email me their address and claim their prize.  If no one responds after a week, I will pick another winner.

Here's another picture of the prize.


And here is one of the second place prize I will offer if we reach 100+ comments.


Comment away, and know that I am working on getting some tutorials ready for you guys.  I am really trying to find out what you are the most interested in learning.  Thanks for your feedback, I want this to be a place where you can come and learn and get some good inspiration.  Hope to hear from you soon!

Tuesday, October 15, 2013

Destash Etsy Shop Sale

I've clearing out some of my mixed media stash, so I'll be having a lot of destash items for sale in my SHOP at pretty good prices.

Glass Bottles


Watch Cases


Game Pieces


Gears and Springs


Stencils


And More!!!  

Stop by my store and have a peek, you might find something that will make your next project complete.  Stop by my Native Bloom Studios shop for some good deals.


Sunday, October 13, 2013

Metal Clay Monday - Silver and Copper Combined


I love this piece by Diana Frey of Tattered Adornments.  She made it in 2012 at a workshop lead by Jonna Faulkner.  It is a copper clay piece with silver clay appliques and cz.  Gorgeous!


These next pieces were made by Lorena Angulo in 2010 at a workshop by Hadar Jacobson.  I love Lorena's work, prepare yourselves to see all sorts of her work on my blog.  


These next pieces are by Vickie Hallmark, and they were also made in 2010 at a Hadar Jacobson workshop.   


I love seeing the copper and silver clay together!  


Saturday, October 12, 2013

Winner of the Charmed Brass Book Necklace

And the winner is


Comment #19, made by Jennifer Truong.  Jennifer, please send me an email with your address to

nativebloom@outlook.com 

so I can get your necklace out to you.  Thanks to everyone who participated, you have provided me much needed insight.  Keep your eyes peeled, I be posting another giveaway Tuesday.


Monday, October 7, 2013

Metal Clay Monday - Lorena Angulo

The first time I saw the lovely pieces by Lorena Angulo, I knew metal clay was for me.  I fell in love with her sculpted treasures and started daydreaming about kilns, PMC, COPPRclay, and sugar skulls immediately.


I joined Flickr in 2009 for the stamp carving community, but soon stumbled across Lorena's photostream and was truly captivated.  I create mixed media art and handmade books and have several articles published, but jewelry really has become the bread winner of all my hobbies.  Now, with two children, I have the choice of going back to a 9 to 5 job (missing my children and giving half my pay over to daycare) or making my own living.  With capital coming soon, I will be investing in a kiln and all the tools and supplies I need to make metal clay jewelry.

Lorena is a spectacular person and I highly recommend you stop by her website and check out her blog.  She is a Mexican artist living and working in Texas.  She is also a thyroid cancer survivor!  Such a strong and beautiful woman.  Her artwork is filled with imagery from her home county, including such iconic images as milagros, calaveras, catrinas, the tree of life, and other Mexican folk art symbols.  I also adore her use of patina, adding the perfect finishing touch to her beautiful artisan jewelry.  She is a certified Qualified Metal Clay Artisan and active member of the PMC Guild.  To see more of her achievements, check out her bio.


Besides whooping cancer's ugly butt, she has been busy; her book Behind the Brooch: A closer look at backs, catches, and pin stems, will be available February 2014, and she also has made several templates for Paper Picado's QuickArt (TM) Template line.  You can find them here.


Thursday, October 3, 2013

Blog Giveaway Celebration - No More Comments Please


We've got a winner.  Go to THIS POST to see who it is! 


To celebrate the start of my new blog, I will be giving away one of my Charmed Brass Book Necklaces (seen in the picture above)!  They were featured in the July 2013 issue of Bead Trends magazine.  I only have one left, and it is my favorite; but I want one of my readers to have it.  So here the skinny folks:

To enter the contest you must comment below.  Each one of the following types of comments counts for a vote.  I will use Random.org to determine the winner, so make sure to make each entry count by listing them INDIVIDUALLY.  International players are more than welcome, this prize is very light weight.  ;)

1.  Comment with an answer to this question - What types of jewelry tutorials would you like to see on this blog?  (Examples: beginner beading, resin and bezels, polymer clay, metal clay, stringing, mixed media jewelry, etc.)

2.  Follow my blog!  I'd love for you to follow me, and I will be offering tutorials and giveaways so it will be beneficial to you too.  Try me out and if you are not happy with my content after a few weeks, just unfollow. Just leave me a comment that says something like "Hey crazy jewelry lady, I am now a Native Bloom follower."  If you have a blog, feel free to include a hyperlink to yours, I will return the favor (and other readers may too).

3.  Tell me would you rather learn by watching a video, reading a blog post, or downloading a PDF (or a combination of two or more of the three)?  

4.  Like my Native Bloom page on Facebook.  When I start my jewelry sales the beginning of next year I will use this page to offer deals and discounts.  Leave a comment letting me know you liked my page (along with your FB name).  

5.  Share this post on your Facebook page (include a link to your post).

6.  Repost this on your blog (make sure to include the link).

7.  Pin this picture with the headline "Charmed Brass Book Giveaway by Native Bloom - ends 10/11/13." Once again, include the link please.


That's seven ways to win!!!!!  Once again, make sure to post each entry individually to give yourself extra chances to win.  I'm going to let the giveaway run until 11:59 PM (Central) on Friday, October 11th, and announce the winner on Saturday, October 12th.  I will post the winning comment on a new blog post that Saturday, so make sure you are following my blog or check back with me on that day.  I will give the winner one week to send me their email address.  If the winner does not contact me by that date, I will choose again.  Game on guys and gals!

Here's a picture of the necklace as it appeared in Bead Trends.  


You guys are rocking the comments, thanks so much!  I'm reading them, just don't want to comment and mess the count up.  Thanks guys for all of your feedback!!!!

Wednesday, October 2, 2013

Easy Bracelet Tutorial - Free PDF


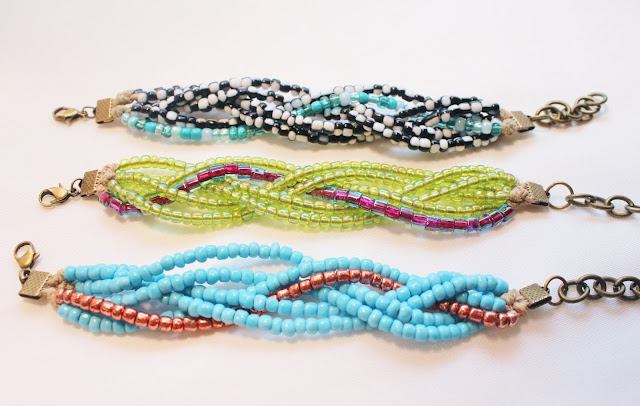
Hi guys!  To say thanks for checking out my new blog I'd like to offer a free PDF download of my tutorial "Easy Multi-Strand Beaded Bracelet".  Go HERE to view or download the PDF.  Just click on the little arrow icon that is right beside the print icon to download.   Please enjoy, and leave me a comment if you like it or have any questions for me.