Showing posts with label bronzclay. Show all posts

Saturday, February 8, 2014

Saturday Sculpt - Sugar Skulls


Here's last week's sculpt, a small, medium, and large sugar skull.  They were sculpted from polymer clay, cured in my oven, and then cast as a mold with Cold Mold.  I use these molds to form bronze and copper clay.  I haven't fired a large one yet, but here's a picture of the small and medium ones in BronzClay straight out of the kiln.  


Keep an eye out for these, they will be in my Native Bloom shop very soon.  I am also working on a charm bracelet to add to the shop that will feature some of my small pieces as charms.  


Thursday, January 30, 2014

Out of the Kiln - Out of the House


I love the oxidation on these pieces, they are straight out of the kiln.  I wonder what makes these lovely colors, and whether there was a way to control them and keep them.  These are bronze, and they have been polished up already.  This peace sign is one of my favorite pieces, but the bail was a complete fail.  I'll post about that later.


It is still so strange to me how some have a rainbow patina from oxidation, some are almost black, and some are bright golden.  At first I had a hard time getting the bronze cleaned down to look even, but found that a nice steel brush works best to clean, then a good two hour tumble produces a gorgeous shine.  This cleans the metal well so you can apply an even patina with chemicals if desired.  I'll post some pics of these brushed and tumbled, but for now I am away from my house, and that is where my camera is located.  :(


This wax seal letter was an order for a friend.  It was polished as well.  The peace sign will not be sold because the bail although completely strong came out ugly and messy.  So it is my every day necklace for now.  I have a similar piece at home that I am dying to fire, but we had a bit of snow here and roads are out, they have been out for days.  Amazing how three or four inches of snow can completely cripple us here in the South, where a real snow only happens once every three or four years.  We are quite ill prepared.  Long story short, we came to my sis-in-law's house where we would be sure to have power, heat, and access to food and water.  I am out of my element and feeling quite strange.

Thursday, January 2, 2014

BronzClay Owl Necklaces


I'm a little bit owl obsessed, and so is my daughter and all of her cousins.  So I decided to design a little owl necklace for them for Christmas.  I knew I wanted something that I could reproduce easily, so I wanted to try a polymer clay sculpture and mold it with Cold Mold.  I started with the big guy on the left, but he took 15 grams of BronzClay, which put me a bit over budget (I had to make 12 of these!).  So I sculpted a smaller one;  you can see it in the picture below to the right.  Cute, right?


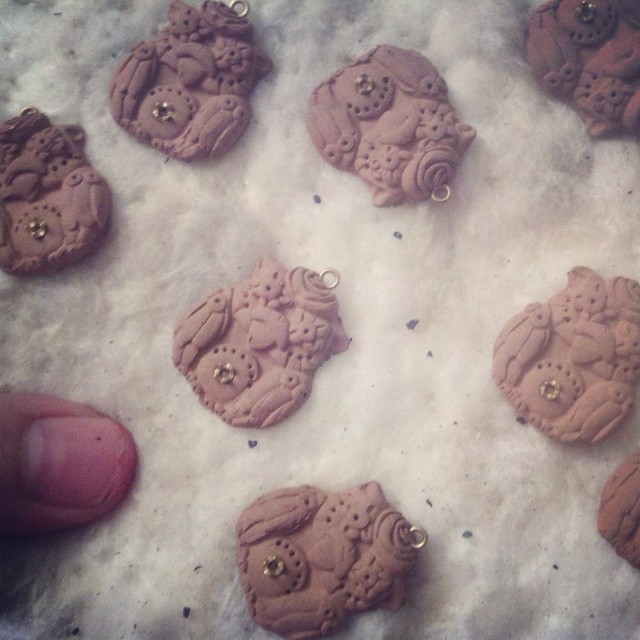
I wanted to try some stones out, so I added some bronze embeddable prong settings in 2 mm, and some 1.6 mm embeddable eyelets .  I'll explain later why I may never use 2 mm settings again.  Below are the dried clay owls, I laid them out on my ceramic fiber blanket to make sure they finished drying.  Sorry for the blurry picture.


Here they are fresh out of the kiln.  I used coconut carbon this time instead of the coal-based.  I read somewhere that the coconut carbon fires cleaner and my batches of BronzClay with the coal-based carbon were very dirty.  Some of these have a lovely dark patina that I just love.  They are the ones that were on the bottom layer of two layers, and I think they were closer to the back.  The fingerprints came out sort of two-toned after the firing.  


I cleaned this batch up with a wire brush before I patinated them so they would absorb more dark color.  Here they are after a dip in liver of sulphur (which STINKS!).


Nice and dark after the LOS treatment.  Dirty birdies.


Below are the different stages of finishing.  The first is the LOS treatment, the second is after a good brushing with a brass wire brush, and the third have been given a nice polish with polishing cloth.  


Here's the texture on the back all polished up.  This is the Flower Quilt rollable texture tile from Cool Tools.  I got 12 texture sheets from them and it was some of the best money I spent so far for, and the Flower Quilt texture is my favorite so far.   


Here are a couple of owls polished up and ready for stones.  


And five of them with stones set (which took forever!)  I actually broke a prong off one of these guys.  The problem is that the stone is too small to keep level, and I had to keep going back and replacing the stone into the setting, and it was just way to hard to put in for the effect.  Not that the stones aren't cute.  And I love that each girl got an owl with her birthstone on it.  It was just too difficult and too many bad words were said.  I wish I had used my 3 mm settings instead.  I will probably never order this size again.


And this is the finished product....a little birdie with a sparkling stone on his belly.  Had to add a key and matching pearl too.


What do you think?  


Monday, December 30, 2013

Metal Clay Monday - Failures and Successes


I thought I would give you guys a peek into the craziness that has been my life the last couple of weeks.  I have been busy, busy, busy making jewelry for the family, and I had some awful failures and sweet successes.  I can hardly believe that I have used almost three 200 gram packs of BronzClay and made jewelry for 23 friends and family members.  I have cried, thrown in the towel, picked the towel back up, and came back from my failures to feel almost like a pro.  I have a ritual, I know my clay, I love the feel of it, I love the smell of Badger Balm.  I have stayed up all night long on at least three occasions running my kiln (I am afraid to run it while I sleep - I have two young ones an a wonderful hubby so it is not worth any measure of risk) so I could make last minute gifts.  What's crazy is that I hope my life is just as crazy after Christmas.  I will be running this jewelry business part time to bring in extra income, and I hope to do this much volume all the time.  

So here is my set up, how I work when I need to make something shiny.  I got a lot of my supplies from Rio Grande, but Cool Tools is just as wonderful (they even send me extra goodies with bigger orders).  I have Cool Slip for my texture plates, water with lavender oil in it to rehydrate my clay, a work surface, steel stamps for numbering fingerprints, molds, clay, and tons of tools.  Don't forget the sweet tea!   


Here's a close up of my tool box.  I used the olive oil the first time I used BronzClay to condition my clay.  I read somewhere that it is necessary, but I found that I had problems with all the pieces from that batch.  I have not conditioned the previous two batches and had no problems with them, the clay feels better without it and is more workable.  I also read on the cool tools site that the clay is better when cold, but I work with mine and store mine room at room temperature.  I have no luck with cold clay.  The alcohol is there for use with my alcohol inks.  Badger Balm is amazing.  It keeps the clay from sticking to my hands, smells great (like wintergreen), feels great, and helps to keep the clay smooth when I ball it up in my hands.  


I was not too terribly happy with my first firing of BronzClay.  The pieces showed some small signs of over firing, and the oxidation was rough.  I also had no idea how to finish my pieces.  I got the firing information from the Cool Tools site BronzClay Firing Guide.  My kiln is a 1680 watt Paragon SC2, so my target temp was 1490 degrees F, I held at 2 hours, and the rate was 212 degrees F since my pieces were about 7 mm thick.  

I read somewhere on an Etsy thread that some people were having success with a two stage firing schedule.  The first on a fiber blanket to burn the binder off, the second in the carbon to sinter.  Wanaree Tanner uses this method for CopprClay with success, so I thought I would try it with BronzClay.  I also dried my pieces in my oven.  My results were pitiful, and made me want to cry and give up.  I have $3000 invested in a business making BronzClay and CopprClay pieces and I could not get a batch to work, I just kept getting worse.  I was miserable!!!!!!  All of my pieces look like they were battered in carbon and deep fried.  They all had cracks and none were salvageable.  

Deep fried misery......


Carbon half picked off, revealing cracked clay and embedded carbon.......


Somehow the metal leached into the carbon surrounding the pieces.  I am still so confused with this.  I did do something different with this batch that I suspect may have something to do with this.  I used nursery water (with fluoride) to rehydrate my clay.  That might be why this happened, or it could be that I ran my second part of the firing too long.  IDK!


So I cried, I threw things, and I said many a bad word (well, just one, over and over again).  For a minute I thought for sure this was another thing I just wanted to try but would have no luck at, that I would never get the hang of it and just fail miserably.  I pitied myself way too much.  Then I got right back on that horse.  My next batch I tried a few common sense adjustments and it was almost perfect.  I had two pieces that bubbled just a bit, but the rest of the batch turned out just fine.  

First I lowered the temperature of my oven when I dried my pieces from 350 to 250 degrees F.  This fixed the cracking issue I had with the previous batch.  250 degrees F, 10 minutes on one side, flip, 5 to ten minutes on the other side.  Perfection!

Then I ran the same firing schedule I figured out before but lowered my target temp to 1470, same rate (212/hour).  Just a bit of bubbling on two pieces, so I lowered my target temp on my next firing to 1465 and have had no problems yet.  

I also switched from coal-based carbon to coconut carbon.  It is cleaner and seems to help the pieces fire more evenly.  I cannot remember who I have to thank for this info, but it has been invaluable.  Probably Mardel Rein from Cool Tools.

Here are some pieces on wax paper ready to be dried in the oven.  I use an old cookie sheet.  I have tried aluminum foil, but if the pieces are very damp they somehow soak up some of the color of the aluminum.  Weird. I have no problem at all with the wax paper.


Dried pieces being drilled.  I save my flakes for later (to make paste with or rehydrate).


Here is my latest batch straight from the kiln.  The darker pieces were closer to the bottom.  I had two layers, and these were in the bottom layer.  The ones that look two toned are that way because of the clay, not their location in the carbon.  For some reason the BronzClay has swirls of a lighter color that are not very apparent until they are fired.  Not a big deal, I just fix it with patina.  


Here the pieces have been brushed and then treated with liver of sulpur and are still wet from the neutralizing bath.  You can treat them with liver of sulphur without brushing them first, but the cleaner they are, the more even the coating of patina from the liver of sulphur.  I have yet to try this with ammonia added in to the mix.


A whole batch of fired pieces with LOS patina.  If you are curious about the owls, I will have a post on them this Thursday.  I love the patina from the LOS,but it smells so bad.  It is ridiculous, and hubby hates it worse than I do.


I love how the liver of sulphur brings out all of the detail.  


After the pieces have dried from the neutralizing bath (baking soda and water), I brush then with a brass brush.  If I want a more matte look, I brush them with a steel brush.  Here are these same pieces after a good brushing.


And same pieces after a quick polish with my 3M Polishing Paper.  I have been using the pink (4000 grit) because it was the first one I tested with and I have since lost all the others from the assortment.  It polishes without removing the patina in the texture.


And here they are all put together on a necklace for my grandmother.  I call her Granny, and she is awesome.  My kids and I see her and my Papaw just about every Friday, and she always cooks way too much food for us and they spoil my kids.  We adore both of them.  My sis-in-law, my sister, and my cousin and I all got together and worked on getting prints, they helped my pay for materials for her and other family members and I did the work.  


Here's a closer view.  I love seeing all the fingerprints, they are all so different.  


I am happy to have all this experience, and I hope to have my shop full of customizable items by mid January.  I know I am ready now for deadlines and multiple sales.  I hope every one of you had a Merry Christmas, and are looking forward to the New Year.  I know I am!

Wednesday, December 4, 2013

BronzClay First Firing

I took a brave step yesterday and fired my first BronzClay pieces.  I did tons of research, and finally ended up using the firing schedule chart on the Cool Tools site.  It was written by Mardel Rein, and it's kinda genius.  You can find it HERE.  Just scroll down for all the information you will need to get started with BronzClay and how to troubleshoot.  The stuff can be sorta fickle, so don't give up if your first go isn't perfect.

My kiln is a Paragon SC2 from Rio Grande, and it is the 1680 watt model, and my thickest piece was 7 mm thick, and I used a 4" high stainless steel container.  So here's the schedule I ran.

Rate:  212 per hour
Target Temperature:  1490 degrees F
Hold Time: 2 hours

That took about 9 1/2 hours to complete, and about an hour to cool down enough for me to take the container out and sift through with a stainless steel spoon to fish my pieces out.  I only fired 7 pieces, and here they are straight out of the kiln.

Dirty, grungy, oxidized, but beautiful and fully sintered.


Cleaned up a bit with my Dremel tool.


And a finished piece, a wax seal pendant on an 18" antiqued brass ball chain with a Swarovski birthstone element.  


I did not polish and sand before I fired these pieces, so I had to do a lot of work after I got them out of the kiln.  I sanded and tried to burnish the piece a bit, but I had a few places where the bronze would sort of flake off.  I was worried the piece had not sintered fully, but I did a test on one of the roses that did the same thing.  I hammered the crap out of it and it sounded metal and did not break or crack or anything.  The more I hammered the more bronze I saw.  I read somewhere that you should anneal the metal before you work with it a lot or it could become brittle and break, so I wonder if the flaking was from working it too hard without annealing it.  I plan on fixing this dilemma by sanding and burnishing before firing so all I will have to do is pickle the piece and polish.  

The back of the medallion has a faux bois texture.


I'm so proud of how this turned out, and I can't wait to make more!!!!!


Monday, December 2, 2013

Metal Clay Monday - My Supplies

My boxes of amazingness from Rio Grande and Lineco.  The Lineco order was four photography lights, a backdrop stand and backdrops, and all accessories.  I haven't used them yet, but hope to get them out soon.  


One of the four lights.  Two have these square soft boxes and two have white umbrellas for diffusing light.  


Here's a picture of my little ones helping me open some items up.  They were so excited, I guess about as excited as I was.  They found the boxes as entertaining as the contents.  Lula wanted to help me open every little box.  Grayson just wanted to eat the packing peanuts.


I purchased a lot of items from Rio Grande, but the biggest purchase was my Advanced BronzClay and CopprClay Kit.  You can find the item HERE, and below is a list of the items that came with the kit.  Lots of stuff I needed for metal clay work.  


BRONZclay™, 200 grams 
COPPRclay™, 200 grams
Rehydration kit
Rio BRONZclay™/COPPRclay™ tool kit
Double-ended carving tools, set/4
Rio PVC work surface
Pocket needle files, set/6
Rio rotary tumbler
Polishing paper; asst./12
Half-round sanding sticks; set/6
Stainless steel shot
Super Sunsheen burnishing compound; 4 oz.
BRONZclay™/COPPRclay™ carving tools; set/5
Rio Cold Mold™ compound; 1 lb.
Solderite™ shelf kit
Stainless steel firing pan with lid
Firing pan removal fork
Coal-based, acid-washed activated carbon; 5 lbs.
Coconut shell–based carbon; 5 lbs.
Tweezers, 18"L
Rio PMC® kiln, 120V

Here's the tumbler that comes with the kit.


My precious.....I can't wait to fire some pieces in this beauty.  I am running a test fire today, an empty run to burn the binder off and get used to programming the kiln.  I'm working on a video for that, so keep an eye out for it this week.


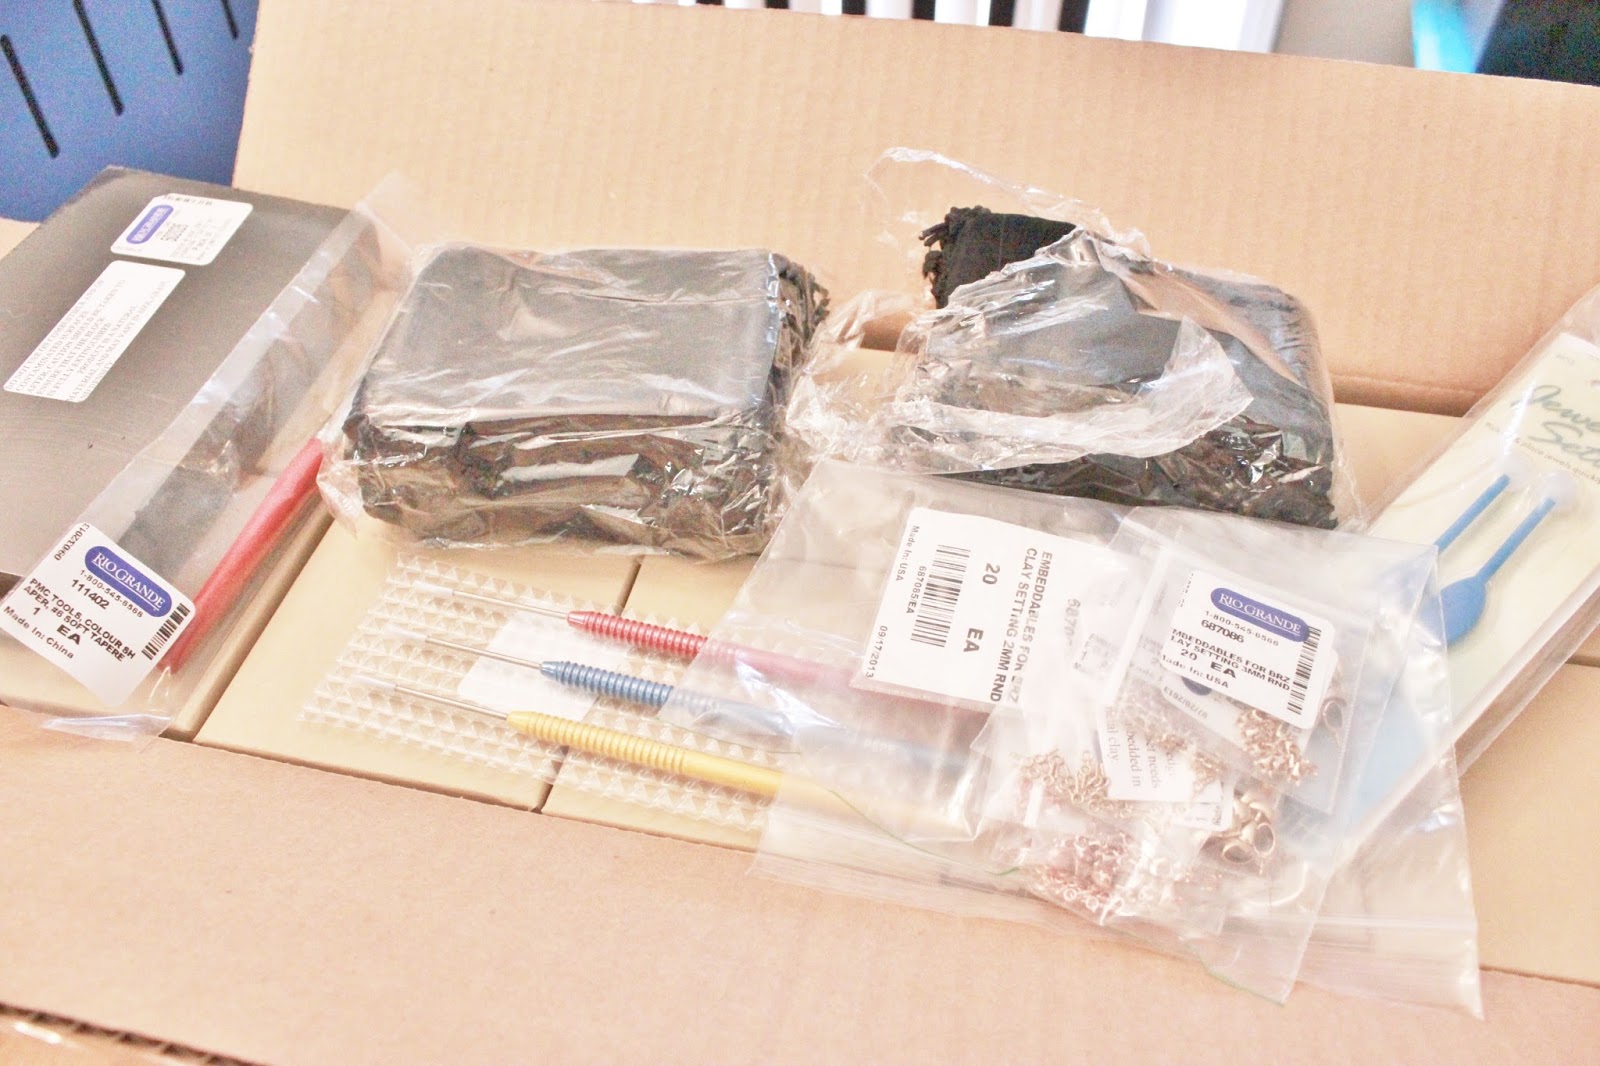
Some items not from the kit...charcoal block, soldering picks, packaging, embeddables, wax sticks for stone setting.


Some of this clay came with the kit, and I ordered another 400 grams of each.  


More kit contents.  Safety glasses, burnisher, palette knife, Dockyard carvers (Yay!!!!), other items.  


Sanding tools and such.


I wanted to do a video unboxing, but to tell the truth this was just too much stuff!  I was overwhelmed!  So I just snapped a bunch of pictures.

I hope to fire some clay tomorrow or Wednesday, wish me luck!!!!