Showing posts with label Copprclay. Show all posts

Friday, December 13, 2013

Giveaway - Denim Blue Dangles - Ends 12/27/13

Need a nice giveaway to brighten up your holidays?  Well, I aim to please.  These dangles started out as test strips from my first ever CopprClay firing, but they turned out so perfect I had to use them as earring components.  I thought of you guys when I got them done.  I have been so overdue for a giveaway, and I wanted to offer something new and exciting.  


Here's the back of the earrings.  I carved the texture with one of my new Dockyard carvers.  The beads are glass pearls in a nice denim blue that compliments the copper very well.


I also added some blue alcohol ink to the front to bring out the texture of the copper.   


How to win:  Each comment counts as a vote.  I will use Random.org to determine the winner, so make sure to make each entry count by listing them INDIVIDUALLY.  International players are more than welcome, this prize is very light weight.  ;)  You can leave your email address, or just check back with me on the 28th to see who won.  Make sure if you are a minor that you get your parents' permission before you enter.  Below is a list of ways to enter.  

1.  Comment below  and tell me whether you prefer bronze or copper jewelry.

2.  Follow my blog!  I'd love for you to follow me, and I will be offering tutorials and giveaways so it will be beneficial to you too.  Try me out and if you are not happy with my content after a few weeks, just unfollow. Just leave me a comment that says something like "Hey crazy jewelry lady, I am now a Native Bloom follower."  If you have a blog, feel free to include a hyperlink to yours, I will return the favor (and other readers may too).  If you are already a follower, just leave a comment saying that you are a follower.  

3.  +1 this on your Google page if you have one.  Add a link in your comment please.

4.  Like my Native Bloom page on Facebook.  When I start my jewelry sales the beginning of next year I will use this page to offer deals and discounts.  Leave a comment letting me know you liked my page (along with your FB name).  

5.  Share this post on your Facebook page (include a link to your post in the comment).

6.  Repost this on your blog (make sure to include the link in the comment).

7.  Pin this picture with the headline "Denim Dangles Giveaway by Native Bloom - ends 12/27/13." Once again, include the link please.


That's seven ways to win!!!!!  Make sure to post each entry individually to give yourself extra chances to win.  I'm going to let the giveaway run until Friday, December 27th, 2013 at 11:59 PM Central.  A winner will be announced in a separate post on December 28th, so follow my blog or make sure to check back on that day.  I will give the winner(s) a week to email me their address and claim their prize.  If no one responds after a week, I will pick another winner. 

Hope you guys have a Merry Christmas, hope to hear from you soon!


Wednesday, December 11, 2013

CopprClay First Firing

Oddly enough, after braving my first firing with BronzClay, I was still very nervous about firing CopprClay.  Maybe because of the high temperature, or the shorter firing schedules I found...I don't know.  I ran a test today and found out I had nothing to be nervous about.  I used the two part firing schedule suggested by Wanaree Tanner, you can find her PDF with tons of useful information for top load and front load kilns on her bog post HERE.  I did alter it a bit because two of my pieces were rather thick.  I did not want them to warp, so insead of a 1100 degree F ramp, I used a 700 degree rate.  I also fired some test strips, but made them pretty and drilled them just in case they turned out okay (which they did).  

Here's the schedule I used.

Part 1:  On fiber blanket placed on top of ceramic spacers.  Kiln vented on top (cone removed).
Rate: 550 degrees F/hour
Final temp: 550
Hold time: 15 minutes

Part 2:  In steel container on ceramic spacers with coconut carbon.
Rate: 700 degrees F/hour
Final temp: 1750
Hold: 3 hours


Here are the pieces before firing.  The textures are made with plates from Cool Tools, except for the back of the test strips which were carved with a Dockyard V gouge.  I use Cool Slip to keep the clay from sticking to the texture plated. 


I didn't get a picture between the first part and the second, but here are the pieces straight out of the kiln.


They fired mostly just right with little oxidation or blemish, except for a spot in the middle of the back of the medallion and a tiny spot on the back of the rose.  These spots almost blistered a bit and looked a deep rosy color.  There were also some pieces of carbon embedded into the texture of the medallion.  Next time I will place a bit of ceramic fiber to cover the texture and lower the temperature of the kiln a bit.  I plan on ordering some steel mesh to wrap detailed pieces and a ceramic firing pan to regulate the temperature inside the firing container.  That will also allow me to lower the temperature of the kiln a bit.  (All these troubleshooting tips I discovered from the PDF by Wanaree that I referenced above).    


The pieces after a quick brush over with a steel brush and a bit of burnishing.  I also hammered the test strips out a bit, they developed a bit of curve in the container.


You can see the texture on the back of the medallion is improved in the next photo.  I hammered it a bit to make sure the piece had fully sintered (which it had), and found that it evened out the texture a good bit.  The little black pocks from the carbon are still kinda noticeable.


I really enjoyed working with the CopprClay so far, and found the firing process to be pretty simple.  I can't wait to try some patinas out on these shiny little pieces.  I did turn the test pieces into a pair of earrings (with a bit of alcohol ink to enhance the texture), and I will be giving them away tomorrow.  So be on the lookout for a long overdue Native Bloom giveaway.    

Monday, December 2, 2013

Metal Clay Monday - My Supplies

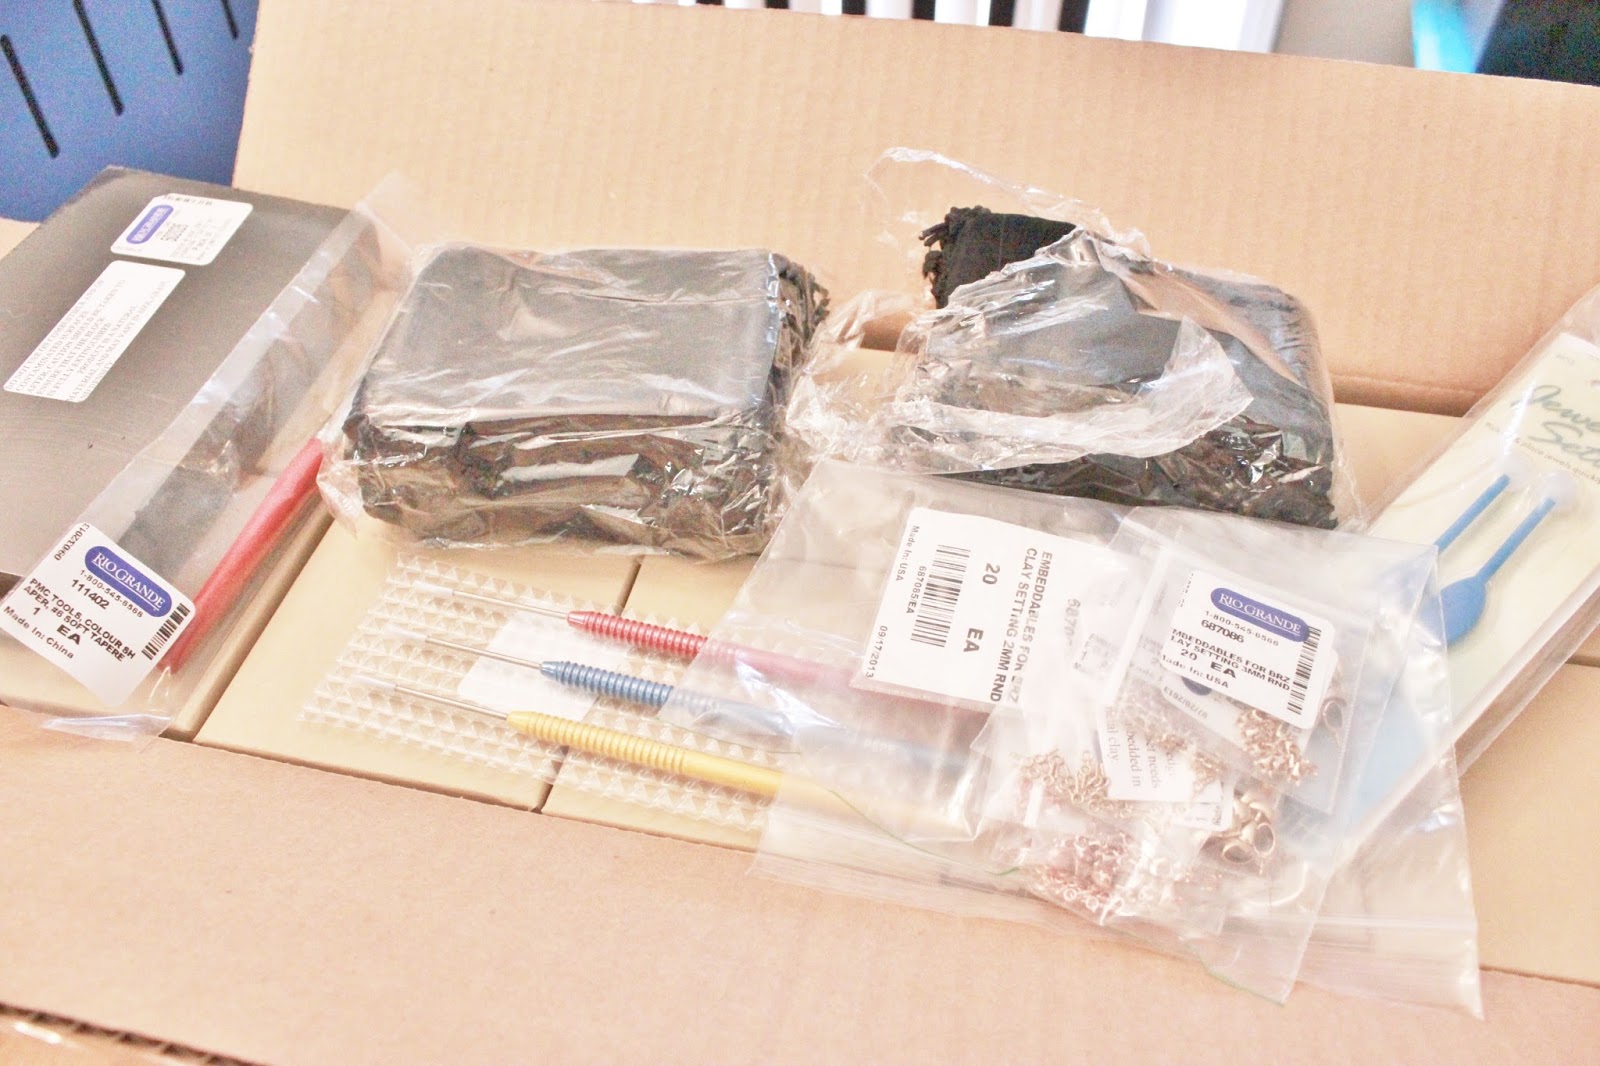
My boxes of amazingness from Rio Grande and Lineco.  The Lineco order was four photography lights, a backdrop stand and backdrops, and all accessories.  I haven't used them yet, but hope to get them out soon.  


One of the four lights.  Two have these square soft boxes and two have white umbrellas for diffusing light.  


Here's a picture of my little ones helping me open some items up.  They were so excited, I guess about as excited as I was.  They found the boxes as entertaining as the contents.  Lula wanted to help me open every little box.  Grayson just wanted to eat the packing peanuts.


I purchased a lot of items from Rio Grande, but the biggest purchase was my Advanced BronzClay and CopprClay Kit.  You can find the item HERE, and below is a list of the items that came with the kit.  Lots of stuff I needed for metal clay work.  


BRONZclay™, 200 grams 
COPPRclay™, 200 grams
Rehydration kit
Rio BRONZclay™/COPPRclay™ tool kit
Double-ended carving tools, set/4
Rio PVC work surface
Pocket needle files, set/6
Rio rotary tumbler
Polishing paper; asst./12
Half-round sanding sticks; set/6
Stainless steel shot
Super Sunsheen burnishing compound; 4 oz.
BRONZclay™/COPPRclay™ carving tools; set/5
Rio Cold Mold™ compound; 1 lb.
Solderite™ shelf kit
Stainless steel firing pan with lid
Firing pan removal fork
Coal-based, acid-washed activated carbon; 5 lbs.
Coconut shell–based carbon; 5 lbs.
Tweezers, 18"L
Rio PMC® kiln, 120V

Here's the tumbler that comes with the kit.


My precious.....I can't wait to fire some pieces in this beauty.  I am running a test fire today, an empty run to burn the binder off and get used to programming the kiln.  I'm working on a video for that, so keep an eye out for it this week.


Some items not from the kit...charcoal block, soldering picks, packaging, embeddables, wax sticks for stone setting.


Some of this clay came with the kit, and I ordered another 400 grams of each.  


More kit contents.  Safety glasses, burnisher, palette knife, Dockyard carvers (Yay!!!!), other items.  


Sanding tools and such.


I wanted to do a video unboxing, but to tell the truth this was just too much stuff!  I was overwhelmed!  So I just snapped a bunch of pictures.

I hope to fire some clay tomorrow or Wednesday, wish me luck!!!!

Monday, October 28, 2013

Metal Clay Monday - Patina Queens


Patina - it can transform a piece, change a mood, take you back in time.  I first saw metal clay on Flickr, and Lorena Angulo was an instant favorite artist.  I followed her right away, and I check her blog and photostream frequently for inspiration and to admire the beauty of her creations.  Yeah, I kinda have an artist crush on her.  It's okay, she knows it.  She works wonders with her folk art pieces, most inspired by her Mexican heritage and rich with culture and beauty.  I love her PMC clay pieces best, she makes amazing use of liver of sulphur.  Here is a picture of her piece "Crown Heart" with a lovely rainbow patina from liver of sulphur.  Find more of her work on her blog.


I also love Kristi Bowman's work.  She uses a lot of copper clay, and torch fires her pieces to achieve a heavenly rainbow patina on them.  I am in love with her pieces, and with the beads and other components she uses with them.  She has an excellent eye for color and texture, and makes pieces that take my breath away.  If you are drooling over these components and don't have the set up to create them, check out her Etsy shop; she sells them at very reasonable prices.  You can also purchase her finished jewelry pieces there, and find her designs frequently on the Earrings Every Day blog.


Not enough beautiful for you?  Need more?  Then check out my Pretty Patina Treasury List on Etsy for more gorgeous pieces.  Here's a peek.


Check back with my tomorrow, I will have my first tutorial available for you in blog, video, and PDF form.