Wednesday, January 22, 2014

I've Been Busy

I know I have been gone forever, but I have been busy.  I have some items in my Native Bloom Etsy shop.  Here's a sneak peek.

Pendant Tray Necklaces, like my owl.  Find him here.


Some artsy ones. Find them herehere, and here.


Monogram.  They're right here.


Scripture.  Get these here.


I also have tons of other items listed, and I am adding weekly until I get a full shop.  I hope to have 350 items by the end of February.  I am busy sculpting, molding, and firing in the kiln.  I still have to fire a lot of pieces to put in my shop, but I do have a few metal clay pieces listed right now.  

Like my Small Peace Sign set.  The necklace is here and the earrings here.


There's also my Small Flower Set.  Find the necklace here, and the earrings here.


 And my Itty Bitty Blooms.  Necklace here and earrings here.


I also have some birthstone glass pearl sets, available in antique copper, antique brass, and bright silver.  You can find them in my Getting Personal  shop section.


They are available in all these wonderful colors.


Thursday, January 2, 2014

BronzClay Owl Necklaces


I'm a little bit owl obsessed, and so is my daughter and all of her cousins.  So I decided to design a little owl necklace for them for Christmas.  I knew I wanted something that I could reproduce easily, so I wanted to try a polymer clay sculpture and mold it with Cold Mold.  I started with the big guy on the left, but he took 15 grams of BronzClay, which put me a bit over budget (I had to make 12 of these!).  So I sculpted a smaller one;  you can see it in the picture below to the right.  Cute, right?


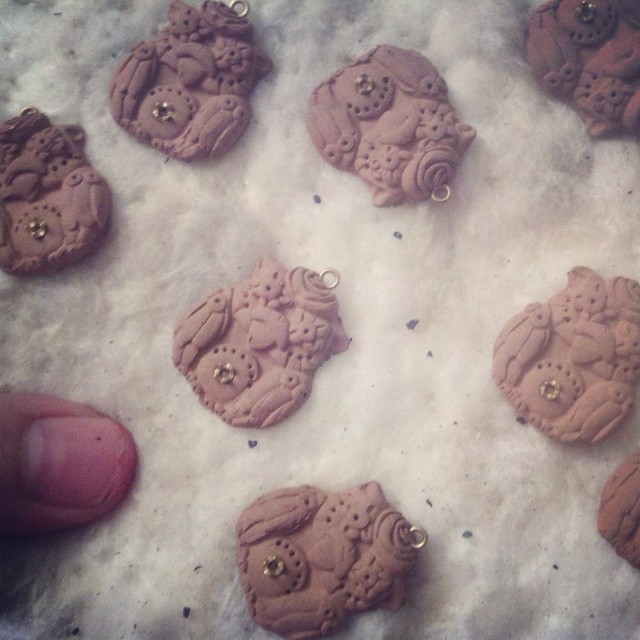
I wanted to try some stones out, so I added some bronze embeddable prong settings in 2 mm, and some 1.6 mm embeddable eyelets .  I'll explain later why I may never use 2 mm settings again.  Below are the dried clay owls, I laid them out on my ceramic fiber blanket to make sure they finished drying.  Sorry for the blurry picture.


Here they are fresh out of the kiln.  I used coconut carbon this time instead of the coal-based.  I read somewhere that the coconut carbon fires cleaner and my batches of BronzClay with the coal-based carbon were very dirty.  Some of these have a lovely dark patina that I just love.  They are the ones that were on the bottom layer of two layers, and I think they were closer to the back.  The fingerprints came out sort of two-toned after the firing.  


I cleaned this batch up with a wire brush before I patinated them so they would absorb more dark color.  Here they are after a dip in liver of sulphur (which STINKS!).


Nice and dark after the LOS treatment.  Dirty birdies.


Below are the different stages of finishing.  The first is the LOS treatment, the second is after a good brushing with a brass wire brush, and the third have been given a nice polish with polishing cloth.  


Here's the texture on the back all polished up.  This is the Flower Quilt rollable texture tile from Cool Tools.  I got 12 texture sheets from them and it was some of the best money I spent so far for, and the Flower Quilt texture is my favorite so far.   


Here are a couple of owls polished up and ready for stones.  


And five of them with stones set (which took forever!)  I actually broke a prong off one of these guys.  The problem is that the stone is too small to keep level, and I had to keep going back and replacing the stone into the setting, and it was just way to hard to put in for the effect.  Not that the stones aren't cute.  And I love that each girl got an owl with her birthstone on it.  It was just too difficult and too many bad words were said.  I wish I had used my 3 mm settings instead.  I will probably never order this size again.


And this is the finished product....a little birdie with a sparkling stone on his belly.  Had to add a key and matching pearl too.


What do you think?  


Tuesday, December 31, 2013

Tutorial Tuesday - DIY Silk Screen for Jewelry Packaging with PhotoEZ


I've had a roll of PhotoEZ for a while now with the intent to use it to place my I Spy logo on handmade mixed media items, but never got around to it.  When I made the decision to invest in my Native Bloom line, I knew for sure I would create a logo with this super easy silk screen material and place my Native Bloom logo on my jewelry boxes.  I ordered simple kraft colored jewelry boxes from Rio Grande.

I ordered them in size 3 1/2 x 3 1/2 inches.  

I worked very hard on a logo that I am so pleased with, only to find out that my image is too fine to burn into the kind of PhotoEZ I have (which is standard - I need the high resolution for this to work.   I will still be using it on business cards, so not really wasted time there. 


Create a Silk Screen for Jewelry Packaging with PhotoEZ


Materials and supplies
Image 
Printer
PhotoEZ sheet or roll
Printer paper
Transparencies
Scissors
Sheet of glass or clear acrylic (larger than your image)
Cardboard or thin flat surface for base
Clips (any kind, just thick enough to hold sandwiched glass and board)
Black paper or material (two pieces)
Bowl of water
Small brush (like a used toothbrush)
Sunlight or UV bulb
Patience - optional, but it does help
Towel or drying surface


To Print
Good ink
Squeegee or thick, flexible card
Item to print on
Water to rinse
Old towel to dry screen on


1.  Choose your image.  Start with a nice crisp design, in black.  If you have an image with fine lines or half tones, you will need the high resolution PhotoEZ.  Otherwise, use the standard sheets.  Here's the design I ended up with.


2.  Print your image. Print it out to the size you want it on regular copy paper.  This will allow you to test your design size on your item before you print the image on your transparencies.  


Cut the design out and place it in position on your item, and make sure everything lines up and looks the right size.  If not, resize and reprint.  If the image is the right size, go ahead and print it out on your transparency.  It is not necessary to flip your image.  Print it as you would read it.  


I double-checked mine once I printed it on the transparency.  This will give you the best idea of what the image will look like on your item.  


Print other sizes out if you need them.  I printed one out for my bags too.  


3.  Prepare the PhotoEZ.  Make sure when you are dealing with PhotoEZ that you do not expose it to sunlight or UV light bulbs until you have the image placed and are ready to burn your image.  It is best to work in a windowless room when you need to cut the PhotoEZ.  


Cut a piece for each image, making sure to leave plenty room around the image to use your squeegee.  Also, cut a small test piece.  This will come in handy and help you test exposure time.  I wasted a lot of this material unnecessarily because I did not know the proper exposure time (it's winter, so I did not have bright sunlight).  Place the remaining PhotoEZ back in its package.


Take your cardboard and place the black paper/material on top.  Peel the protective film off the PhotoEZ.  It's kind of a pain to remove.


 Place the PhotoEZ sheet shiny side up in the black material.  Place your image face down on the shiny side of the PhotoEZ.  You can see from the picture below that any words you used on the image will appear backward to you from this view.  Place a sheet of glass or acrylic over the sandwiched layers and clip down tight.  If the image is not down tight you might end up with a blurred image, or a solid screen.  Place a piece of dark or thick cloth or material over the whole board and image to prevent premature exposure.  


4.  Expose the PhotoEZ.  You are ready to take the image to a light source and expose it.  Please review and use these guidelines before exposing the screen.  Today was a nice day for winter, but a winter day none the less.  Here's a view from my front door at noon today.


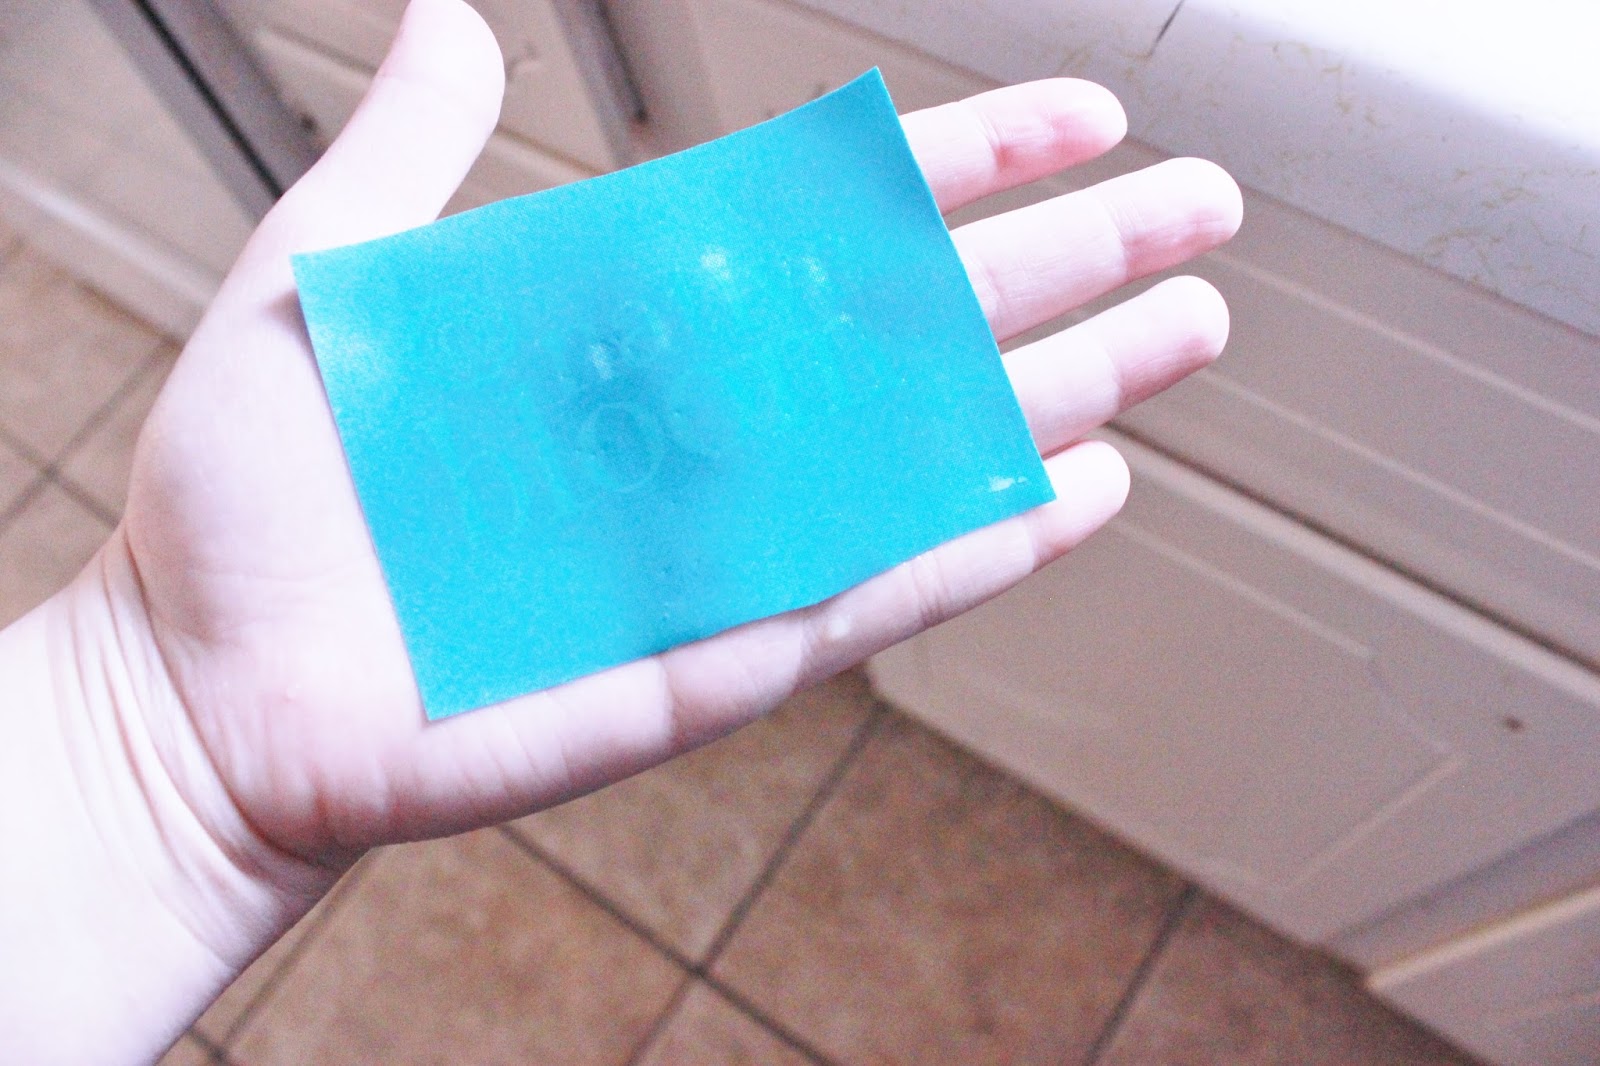
Since I did not have full sunlight, I needed to lengthen the exposure time.  For a transparency in bright sunlight, the exposure time is 50 seconds.  After many tests and failures, I figured the correct exposure to be right at 4 minutes.  You can tell the screen is ready when it turns from green to a dark teal color.  Don't overexpose or you could end up with an image that will not wash out.  If the screen turns dark blue, it is probably overexposed.  I placed my image flat on my porch, but if the sun is bright it is recommended that you hold your image at a perpendicular angle to the light.


Here's my properly exposed screen, and you can sort of see the letters in green.  In person, when you remove the image from the screen the image is visible on the screen and looks very green in contrast to this teal color.  


5.  Time to rinse.  Place the screen in a bowl of water and let it soak for a couple of minutes.  


After the screen has soaked for a little while, place it on your hand shiny side down.  The shiny side will be soft and easy to damage, so this will protect the detail in your image. 


 Hold this under running water for a minute, then start to clean the screen where the image is with a toothbrush.  Use soft, gently circling motions to clear the screen where the image is.  Do not scrub too hard or you will remove too much.  If you find that the image does not come clean, it might be overexposed.  If areas other than your image are coming off, the screen is underexposed.  


Hold the screen up to the light to make sure the image is cleaned out fully.  If you see any remaining material on the design, rinse and brush again.  


6.  Finishing the screen.  Once the screen is cleaned out, place it back into the sunlight for at least 10 minutes to finish the screen.  Since it's winter here, I left mine out for 20 minutes.  


Here are some of my screens.  The first two are still drying and need to be exposed again to finish.  The third screen is fully exposed and ready to print with.  


Here is a finished screen with a piece of the PhotoEZ material on top of it to illustrate for you the difference in the color of the material from start (unexposed green) to finish(dark blue).  


An attempt to use the screen with cheap craft paint.  Notice how bad the bleeds are.


An attempt to use the screen with tube acrylic.  It does not flow well and I ended up with several gaps.  


I don't have any black silk screen ink, but I do have some yellow that hubs found me at a thrift store.  The difference using this ink is incredible.  The image is clear and crisp, and the ink is raise and looks sort of embossed.  


I can't wait to get some black ink and test this out!  My packages are going to look so smooth!!!!!  I will update this post when I get some.  :)


Monday, December 30, 2013

Metal Clay Monday - Failures and Successes


I thought I would give you guys a peek into the craziness that has been my life the last couple of weeks.  I have been busy, busy, busy making jewelry for the family, and I had some awful failures and sweet successes.  I can hardly believe that I have used almost three 200 gram packs of BronzClay and made jewelry for 23 friends and family members.  I have cried, thrown in the towel, picked the towel back up, and came back from my failures to feel almost like a pro.  I have a ritual, I know my clay, I love the feel of it, I love the smell of Badger Balm.  I have stayed up all night long on at least three occasions running my kiln (I am afraid to run it while I sleep - I have two young ones an a wonderful hubby so it is not worth any measure of risk) so I could make last minute gifts.  What's crazy is that I hope my life is just as crazy after Christmas.  I will be running this jewelry business part time to bring in extra income, and I hope to do this much volume all the time.  

So here is my set up, how I work when I need to make something shiny.  I got a lot of my supplies from Rio Grande, but Cool Tools is just as wonderful (they even send me extra goodies with bigger orders).  I have Cool Slip for my texture plates, water with lavender oil in it to rehydrate my clay, a work surface, steel stamps for numbering fingerprints, molds, clay, and tons of tools.  Don't forget the sweet tea!   


Here's a close up of my tool box.  I used the olive oil the first time I used BronzClay to condition my clay.  I read somewhere that it is necessary, but I found that I had problems with all the pieces from that batch.  I have not conditioned the previous two batches and had no problems with them, the clay feels better without it and is more workable.  I also read on the cool tools site that the clay is better when cold, but I work with mine and store mine room at room temperature.  I have no luck with cold clay.  The alcohol is there for use with my alcohol inks.  Badger Balm is amazing.  It keeps the clay from sticking to my hands, smells great (like wintergreen), feels great, and helps to keep the clay smooth when I ball it up in my hands.  


I was not too terribly happy with my first firing of BronzClay.  The pieces showed some small signs of over firing, and the oxidation was rough.  I also had no idea how to finish my pieces.  I got the firing information from the Cool Tools site BronzClay Firing Guide.  My kiln is a 1680 watt Paragon SC2, so my target temp was 1490 degrees F, I held at 2 hours, and the rate was 212 degrees F since my pieces were about 7 mm thick.  

I read somewhere on an Etsy thread that some people were having success with a two stage firing schedule.  The first on a fiber blanket to burn the binder off, the second in the carbon to sinter.  Wanaree Tanner uses this method for CopprClay with success, so I thought I would try it with BronzClay.  I also dried my pieces in my oven.  My results were pitiful, and made me want to cry and give up.  I have $3000 invested in a business making BronzClay and CopprClay pieces and I could not get a batch to work, I just kept getting worse.  I was miserable!!!!!!  All of my pieces look like they were battered in carbon and deep fried.  They all had cracks and none were salvageable.  

Deep fried misery......


Carbon half picked off, revealing cracked clay and embedded carbon.......


Somehow the metal leached into the carbon surrounding the pieces.  I am still so confused with this.  I did do something different with this batch that I suspect may have something to do with this.  I used nursery water (with fluoride) to rehydrate my clay.  That might be why this happened, or it could be that I ran my second part of the firing too long.  IDK!


So I cried, I threw things, and I said many a bad word (well, just one, over and over again).  For a minute I thought for sure this was another thing I just wanted to try but would have no luck at, that I would never get the hang of it and just fail miserably.  I pitied myself way too much.  Then I got right back on that horse.  My next batch I tried a few common sense adjustments and it was almost perfect.  I had two pieces that bubbled just a bit, but the rest of the batch turned out just fine.  

First I lowered the temperature of my oven when I dried my pieces from 350 to 250 degrees F.  This fixed the cracking issue I had with the previous batch.  250 degrees F, 10 minutes on one side, flip, 5 to ten minutes on the other side.  Perfection!

Then I ran the same firing schedule I figured out before but lowered my target temp to 1470, same rate (212/hour).  Just a bit of bubbling on two pieces, so I lowered my target temp on my next firing to 1465 and have had no problems yet.  

I also switched from coal-based carbon to coconut carbon.  It is cleaner and seems to help the pieces fire more evenly.  I cannot remember who I have to thank for this info, but it has been invaluable.  Probably Mardel Rein from Cool Tools.

Here are some pieces on wax paper ready to be dried in the oven.  I use an old cookie sheet.  I have tried aluminum foil, but if the pieces are very damp they somehow soak up some of the color of the aluminum.  Weird. I have no problem at all with the wax paper.


Dried pieces being drilled.  I save my flakes for later (to make paste with or rehydrate).


Here is my latest batch straight from the kiln.  The darker pieces were closer to the bottom.  I had two layers, and these were in the bottom layer.  The ones that look two toned are that way because of the clay, not their location in the carbon.  For some reason the BronzClay has swirls of a lighter color that are not very apparent until they are fired.  Not a big deal, I just fix it with patina.  


Here the pieces have been brushed and then treated with liver of sulpur and are still wet from the neutralizing bath.  You can treat them with liver of sulphur without brushing them first, but the cleaner they are, the more even the coating of patina from the liver of sulphur.  I have yet to try this with ammonia added in to the mix.


A whole batch of fired pieces with LOS patina.  If you are curious about the owls, I will have a post on them this Thursday.  I love the patina from the LOS,but it smells so bad.  It is ridiculous, and hubby hates it worse than I do.


I love how the liver of sulphur brings out all of the detail.  


After the pieces have dried from the neutralizing bath (baking soda and water), I brush then with a brass brush.  If I want a more matte look, I brush them with a steel brush.  Here are these same pieces after a good brushing.


And same pieces after a quick polish with my 3M Polishing Paper.  I have been using the pink (4000 grit) because it was the first one I tested with and I have since lost all the others from the assortment.  It polishes without removing the patina in the texture.


And here they are all put together on a necklace for my grandmother.  I call her Granny, and she is awesome.  My kids and I see her and my Papaw just about every Friday, and she always cooks way too much food for us and they spoil my kids.  We adore both of them.  My sis-in-law, my sister, and my cousin and I all got together and worked on getting prints, they helped my pay for materials for her and other family members and I did the work.  


Here's a closer view.  I love seeing all the fingerprints, they are all so different.  


I am happy to have all this experience, and I hope to have my shop full of customizable items by mid January.  I know I am ready now for deadlines and multiple sales.  I hope every one of you had a Merry Christmas, and are looking forward to the New Year.  I know I am!